Showing posts with label home improvement. Show all posts

Tuesday, April 16, 2013

A trip into the closet.....

I don't like closets. I don't like the messes they contain. And no, I am not talking about my sexual orientation.... nothing quite so titillating, I'm afraid.

 I am talking the literal, dark, disastrous cupboards that we all have in our homes. The catch all. The place where we can cram our junk and close the door. Those closets. Well, I've had enough and  I decided to do something about a couple of mine.

My craft room, to start.....

It started out as one of those doors that one dared not to open for fear of immediate death by crushing. At some point it morphed into a undecipherable pile and the door could no longer even BE closed. Plus, the damn open door takes up too much room and blocks my bookcase......

Something HAD to be DONE........


Firstly, I pulled off the door and pulled out the organizer (read "organizer" with intense derision that such a contraption should dare to call itself so). Rather than paint, I decided to make the closet a bit of a focal point with a dramatic wallpaper. The result (although, further organization in the form of pretty baskets is required) is such an improvement that I can't wait to start on the next closet on my list......


I LOVE this wallpaper! Unfortunately, it has been discontinued


No skeletons here......

Wednesday, April 10, 2013

I Win

Warning! Do not allow, 6-15 year old, video-game-obsessed,  boys or girls look at this post (a few adult men and women might want to avoid it as well*).

*I am currently not accepting applications for new children and/or room mates (unless you cook, clean and pick up dog poo, then I might reconsider).... Decorating advice is always free.

We recently had our entire house painted (main living areas). The basement was in the worst shape. The previous owners did an amazing job when they finished the basement, but I suspect they used a paint/primer combination directly on the fresh, dry wall, because.... Oh Man, did that paint fleck the frack off!  The basement looked like it had reverse chicken-pox.

Here are a few before pictures. The colour of the walls was a dark, reddish brown (It's washed out in the pictures, but you can see the damage). Too dark for a basement.


Blurry picture of what it sort of looked like... from a couple of years ago.
Eli is playing full size "Angry Birds" that he constructed out of a tent making kit.

And NOW..... 


The right side of the room will have instruments set up. 
A place to display lego & video game collectibles  
Yes, those are Super Mario decals.
They go around that side of the room
And, THAT is why I win.......
Totally.
Dad got this for us and it's been in storage ever since.
It was too large to fit anywhere, but we finally decided to cut it down and install it.
It is 6ft tall and 7ft wide. We are lucky to have something so cool. 


I love it down there now. It's bright, cheery and fun! Too bad it smells like pre-adolescent boys........

Wednesday, October 10, 2012

Even Better.....

My craft/studio room continues to evolve. I have now completed the other half of the room.

It looked like this last week:


I wasn't super happy with this side of the room. The other side of the room is so far beyond Awesome, that Awesome needs binoculars and night-vision to see it, but this side was rather blah in comparison. I fixed it though... now Awesome won't know which way to look because both sides are equally beyond Awesome's ken.


This side has:

2 Ikea Expedit 2x2 shelves mounted on the wall. The 2x2s come with mounting instructions, but I decided to put a rail below them for extra support, mainly because they were being mounted to look good and not on studs and a few drywall anchors are not strong enough for my complete comfort. We attached the rail on the studs and then set the cabinets on top of the rail and anchored them. I think they'll be more than strong enough for my needs now.

1 Ikea Expedit 2x4 against with wall with a desk attachment. Apparently, I'm not the only one who doesn't want leave this room and, as I don't like to share, I thought the kids needed their own desk.... Plus it'll be great for my future Drum Carder.... and as a cutting table.... and... OK, it's really more space for me, but I won't tell the kids if you don't. I also purchased some doors, drawers and purple baskets for the cubby holes. These now hold the rest of my yarn, my fibre and a few other bits that I didn't have proper space for. The room is so organized that I almost don't want to use it.

3 picture rails above the bookcase (which I already had).

The only problem I had with this whole redecorating scheme was that my 30 year old Singer sewing machine died when I tried to make some cushions to sit on (for TV watching).... You can't have a sewing room without a sewing machine.

So I fixed that to.


And now that my house is back in order from THAT mini-reno... must be time to rip apart something else..... Next week, maybe; I have some sewing to do first.

Sunday, September 30, 2012

I'm never coming downstairs again....


IT IS DONE!!

My craft studio is complete (mostly) and it is so awesome that I have no words. OK, I have a lot of words, but they are farther down, so they don't count.... much.

Here is where the magic happened. I LOVE this wall. Love it with a deep, abiding passion. Let's just say that if Justin Timberlake or Colin Firth or the Hot Scientist dude from Eureka (Ed Quinn) dropped by and asked me to run away with them, I'd have to think really hard about leaving this room behind......


The basic plan is (mostly from Ikea, because they make great, cheap storage furniture... and I had most of it already):

2 Pax wardrobes from Ikea (used to be in Chey's Room)
1 Trofast frame (the one that looks like stairs) 
1 Helmer Drawer unit (the only Ikea item I had to buy)
1 Lack coffee table, top removed
1 4x8 panel of slot wall, painted (and accessories). Next time I want to paint slot wall, someone shoot me, OK?

My original plan was to buy two of the Helmer drawer units (or something like them) and stick the Lack coffee table  (used to be used as a play surface for the kids) on top as a desk, but when I was thinking about what to do with the furniture in the room already, it occurred to me that the Trofast unit might make a good base for a desk. I couldn't believe it when the Helmer and the middle step of the Trofast were within 1/4" of each other! It was perfect. The casters of the Helmer have sunk into the carpet enough that I don't even have to shim the desk to make it level. It's perfect. I only used the top of the Lack coffee table, it was way too tall with the entire coffee table on the "base".

Once the room was painted I shoved everything where I wanted it and it looks like it was made for the space. There are no gaps anywhere. The items fit perfectly (I planned that, actually and again, the Trofast saved the day, by being the perfect size to eat up the bit of space betwixt desk and tower). 

See all of my wonderful storage? (I plan to replace the plastic bins on the slot wall shelves with something else: eventually. The ones inside the tower are fine).

Inside the right tower 

Drawers of yarn

These drawers will contain my fabric.
Still to be organized.

This still needs to be organized.


My grandmother made me this

Sock yarn/lace yarn remnants in glass.
 The deer fabric is covering a paint can, filled with yarn.
The Blue glass is from Egypt and has my signature needles
and some hand carved crochet hooks.


some colourful fibre, beautiful lace yarn... this space is heaven


The real problem with the room was the floor. Sewing on carpet is not much fun. The sewing part is fine, it's the CLEANING that's not fun. We aren't quite ready to do a full scale floor replacement though, so after much thought and a thorough scouring of the Internet, I decided to paint a floor cloth. This was probably the most painful part of the job as I wanted a large floor cloth (almost completely covering the floor) and I didn't really have space big enough to paint it and then let it cure. I painted in the basement (it took a gallon of primer and 3/4 of a gallon of paint, but only a quart of varnish and 6 days, including dry time) , but pulled apart my guest room to let it cure for a few days before wrestling (there is no better word, I fought that sucker into place!) it down today. It's not perfectly flat (it was most difficult to get it to lay flat without pulling apart the entire room), but I think it turned out great! And it's sweep-able and damp wipe-able... perfect for a craft room, no?


 The cloth is painted Ombre (dark centre and faded out to either end). I decided not to go for crisp lines, but blended the lines together as I painted. It's subtle and I love it.


I still want more storage on this side of the room,
but I need to let some ideas ferment for a bit before I tackle them. 

Subtle Ombre stripes. 

Need to think on a chair solution as well.
Perhaps an Ottoman might work??
One of the best parts of this room, is that it is STILL Chey's play room. Her toys are still in the Trofast bins under my desk, her Calico Critters sit atop a cedar chest filled with fibre AND she might actually use it now. At least, she will most likely use it while I sew and futz around. She didn't like playing in that room by herself. Now we can both play; she with her toys, I with mine.


Next job (after I clean up the mess from this one) -BASEMENT. That's just painting, though: maybe.

Saturday, September 1, 2012

What just happened??

I've been a very busy girl, since last I wrote.....


When I walked into my house last Sunday, I was struck by all of the things that I've been ignoring. The disorganized mess of the mud/laundry room (room is a bit generous... it's more like a walk in closet leading from the garage to the rest of the house), the state of the carpeting upstairs (I'm pretty sure it is original to the house which was built in 1997 and it's gross), Chey's disused "playroom", Chey's crowded bedroom, the fact that, aside from some small changes, we have not painted since we moved in and the ENTIRE house needs a paint job..... in other words, I lost my marbles and went, for a lack of a better term....completely off the rails.... and Dale let me (not that he could stop me, mind.... when I get like that, the best thing you can do is smile and nod and hang on for the ride......). I immediately dropped my bags  and got to work.... my first goal.... making Chey's room a little less crowed.

My plan for Chey's room was to move the two tall Pax wardrobes from Ikea into her "playroom" which I would then convert into my studio (leaving her toy area intact). This would allow for more space in her room and more storage in mine. I then planned to buy her either a captain's bed or a loft bed. After a quick perusal of various sources of children's furniture I decided to check Kijiji and found a solid maple loft bed with an included dresser for super cheap and the plan was born......

Chey's room Before: (this is really before.... like way back when she moved from a crib to a bed... I've reorganized her room several times since; you can't really see how crowded her room was, so you'll have to trust me). It had the two Pax wardrobes, plus a desk and a bookcase and that ugly fan... I hate ceiling fans! There was only a narrow alley between the bed (which was against the wall at this point) and the rest of the furniture.


Chey's room Now:


Much better, eh??

In case you were wondering what I did UNDER The bed.... I made it a little library and attached some book slings, that I made, to the bed frame. I also made a book sling for beside her bed.

Under the bed


The end of the underbed area


Bedside Sling


I made the slings after being inspired by THIS tutorial, although I didn't follow it at all. I used a double curtain rod set (it was cheaper than buying all the parts separately like she recommends in the tutorial), but the downside of using a double curtain rod bracket is that the book sling can't carry as many books because the rods only sit an inch apart (a problem for fatter books). I'm not sure how this could be solved, but it's something to consider if you make your own book slings. Perhaps off-set, single brackets or extended arms or something..... The fabric was purchased at Ikea and I still have a bit of the bug material which I plan on using to make a body pillow to replace the flip chair that is currently under there (it takes up too much room).

The other big craft project that I did to make the room tidier and roomier, was to make a stuffy storage thing-a-ma-jig (it's a stuffy jail, there is no better way to describe it, I'm afraid). I was inspired 
by a stuffy Zoo that I found online, but decided to try to make one myself. I re-purposed a VHS storage cabinet that my Mom made for me in the late '90s that has sat empty since we converted, first to DVDs, and then to Digital movies. I didn't want to get rid of the cabinets though (they are solid pine and my Mommy made them) so I've been lugging them around for a years.


First I took off the doors and installed a dowel.


Then I stained the entire thing green (Chey's favourite colour)


Then I took a hammer and expressed some lingering frustration in a most satisfying manner...... this is known in DIY circles as "antiquing"


I then added hooks and bungie cords


And made this pile of stuffies (which were contained in TWO overflowing, pop-up laundry bins)


Look like this.....


Now that Chey's room is done... I can move onto my studio...... which currently looks like the place where our extra crap goes to die (it was tidy before Chey's room was demolished, but I have no photographic evidence to support this statement). I should paint first, but I can already feel the urge to skip that part setting in..... must resist?


Tuesday, June 19, 2012

I know you want to see the finished product

Man! Have I been in a funk lately! Not sure if I had a touch of something or just localized blech, but I woke up on Saturday to a much cheerier disposition (although Dale might dispute this) and we finally finished our front garden (maybe 98% finished, I still have some plants to plant and a few decorative items to buy and place, but mostly... it's done!). I looks so pretty that I thought I should show it off.... I did a post about the "before" and "mid-way" portions a month or so ago, but here is a before shot if you're too lazy (as I would be) to go back and check.


And now....


I think it's much better and as time goes and things grow it will look even nicer....

Here are some close ups of the rock garden (or smurf/fairy garden as my neighbour's daughter calls it)


Eventually there will be moss and creeping thyme between all of the pavers

Isn't this pretty?


We also made our own stepping stone out of concrete when Dale expanded the Driveway.... I wanted to draw in the expansion, but how do you take that with you??

And here are a few pictures of the backyard. Lots of planters


Gladiolas, my first time growing these...


The garden box.... it's looked exactly like this for a month.... We need some SUN!


One of the two tomato plants that I started in the house in January... It's HUGE!


And the main garden bed... which gets prettier every year...


I also made a new birdbath. I used a glass plate that I had made several years ago when I experimented with glass fusion. The plate is really pretty, but not very functional. I used a bit of chain and a hanging basket holder... it's perfect!


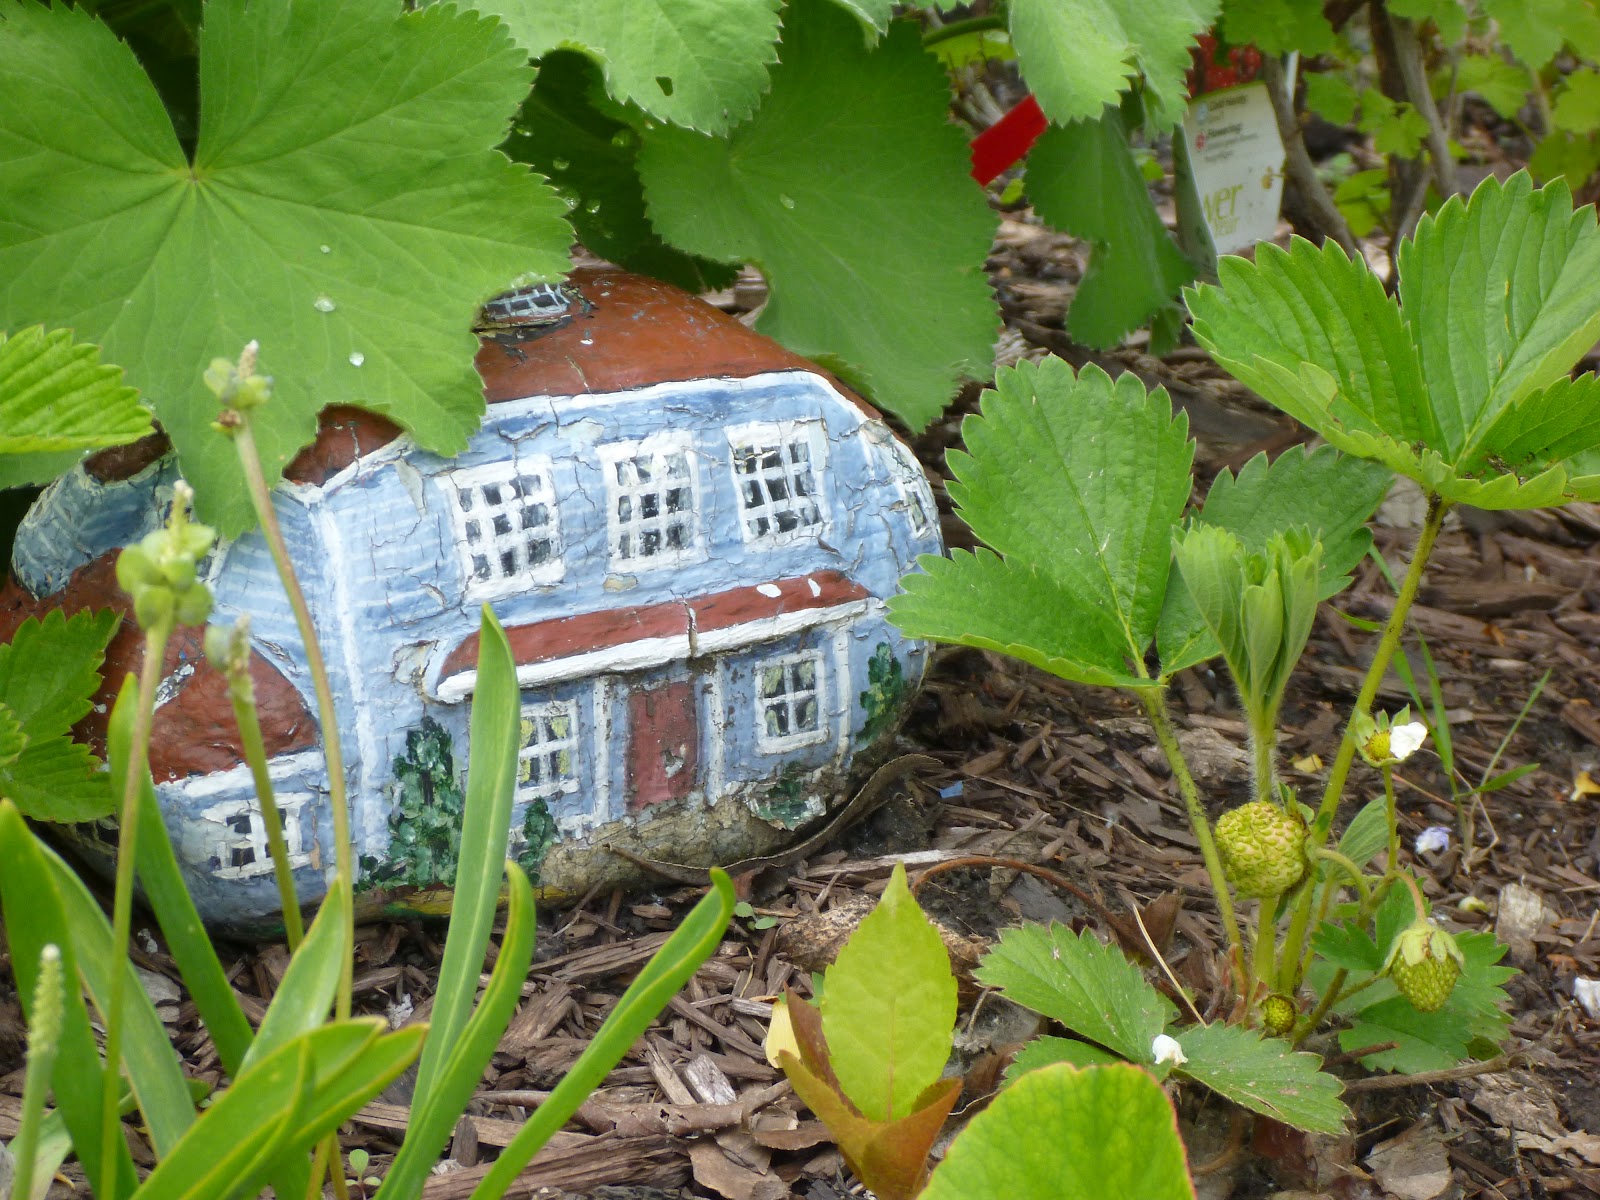
My MIL paints rocks to look like flowers and houses... They look fantastic in the garden, tucked under plants like little fairy houses....