I.AM.DONE!
Both kids costumes are now complete and if you thought Chey's was cool...... you are going to absolutely love Eli's.... OK, maybe that's just me (my nerd side runs strong this time of year), but I am so stinkin' proud of this costume I could, literally, run up and down the street yelling about it at the top of my lungs (I'll just bash you guys over the head with it instead). On the surface, it's probably not all that impressive....... but once you notice the details..... this costume is MADE from details.......
My inspiration for this costume were these pictures of Link (from the Legend of Zelda, Twilight Princess)
I started with a base (and the only items that were not made by me) of a white mock-neck top, camel coloured pants and a couple of belts.
I then thought about the items that would require knitting. Eli had asked me for a Link hat this summer, so that was already done, but I decided to knit fingerless gloves for the gauntlets and a garter stitch shirt for the chain-mail shirt (garter stitch looks a lot like the chain mail in the pictures and it has the added bonus of being a LOT warmer than chain-mail).
Once that was complete, I started thinking about the shield, sword, scabbard, bracer and boots. I found a website called
cosplay that had a lot of ideas for making these items (some made from metal, others from wood, but I chose foam core and was inspired by this
one) and started with the shield. The shield turned out fabulously and the series of pictures here showed the process I used to complete it.
 |
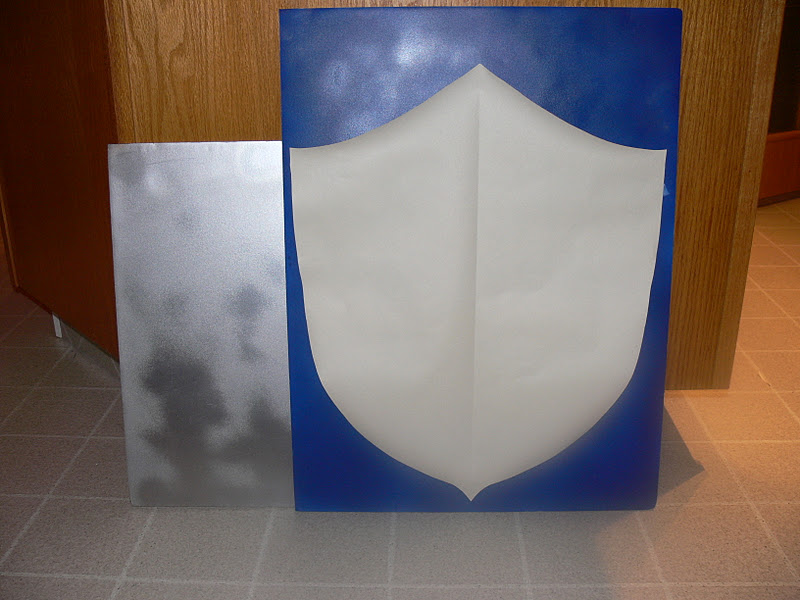
| I first painted the two foam core sheets, One Blue (with Silver back and one Silver (just the front) |
|
 |
| I cut both pieces into shield shapes and then cut the centre out of the silver sheet |
|
 |
| I glued the two pieces together and clamped them to dry over night |
|
 |
| I then cut and glued on fun foam shapes for the Tri-Force |
|
 |
| I used fabric paint to add rivets and raised details on the shield |
|
 |
| Close up of rivets (I used brown fabric paint and then had to over paint it silver). I then sponged metallic silver and black paint all over the silver parts of the shield for depth of colour |
|
|
 |
| I then used puzzle saver to protect the soft foam before spraying the whole she-bang with clear varnish and hot gluing straps onto the backs. |
|
Once the shield was complete, I cut the tunic out of dark green fleece and used dark ribbon to lace the sides and add a bit of embroidery detail.
I then used some suede that I had originally purchased for something else (10 years ago and never used... I can't even remember what it was intended for) and sewed, very carefully on my machine, some boot covers. I also cut a bracer out of fun foam and used the fabric paint to add the detail.

Once all of that was completed, I focused on the problem of a sword and scabbard. I wasn't sure what I was going to do there (I spent yesterday driving around looking for something, ANYTHING that would work, but alas.... found nothing), and ultimately decided to make a sword out of foam core using inspiration from a tutorial I found on YouTube (Here is his
website). I couldn't use the tutorial as that sword was made for a grown man and would have been way to large (ask me when I thought about that.... yes, it would have been AFTER I cut out all the pieces and started gluing them together and realized that the sword was about 1.5 times taller than Eli). I was feeling rather done with the whole thing at this point so I don't have a good photo selection of the process of either sword or scabbard. The scabbard was the head scratcher for me.... how to make a scabbard that would actually stay open to hold the sword.... In the end, I cut the foam core a bit more than twice the width of the sword and then scored 3 two inch lines down the length. I then, carefully, folded the scabbard into shape and cut the points.... The points were a bit tricky, but with some brain help from Dale, I was able to cut slices into the triangles that helped me to shape the end of the scabbard into a three dimensional point. Once that was all hot-glued together, I spray painted and added the details......

And here he is.... Link, from the Legend of Zelda, Twilight Princess......


Do I RAWK or what?!!!




 Posts

