Showing posts with label crafts. Show all posts

Saturday, September 1, 2012

What just happened??

I've been a very busy girl, since last I wrote.....


When I walked into my house last Sunday, I was struck by all of the things that I've been ignoring. The disorganized mess of the mud/laundry room (room is a bit generous... it's more like a walk in closet leading from the garage to the rest of the house), the state of the carpeting upstairs (I'm pretty sure it is original to the house which was built in 1997 and it's gross), Chey's disused "playroom", Chey's crowded bedroom, the fact that, aside from some small changes, we have not painted since we moved in and the ENTIRE house needs a paint job..... in other words, I lost my marbles and went, for a lack of a better term....completely off the rails.... and Dale let me (not that he could stop me, mind.... when I get like that, the best thing you can do is smile and nod and hang on for the ride......). I immediately dropped my bags  and got to work.... my first goal.... making Chey's room a little less crowed.

My plan for Chey's room was to move the two tall Pax wardrobes from Ikea into her "playroom" which I would then convert into my studio (leaving her toy area intact). This would allow for more space in her room and more storage in mine. I then planned to buy her either a captain's bed or a loft bed. After a quick perusal of various sources of children's furniture I decided to check Kijiji and found a solid maple loft bed with an included dresser for super cheap and the plan was born......

Chey's room Before: (this is really before.... like way back when she moved from a crib to a bed... I've reorganized her room several times since; you can't really see how crowded her room was, so you'll have to trust me). It had the two Pax wardrobes, plus a desk and a bookcase and that ugly fan... I hate ceiling fans! There was only a narrow alley between the bed (which was against the wall at this point) and the rest of the furniture.


Chey's room Now:


Much better, eh??

In case you were wondering what I did UNDER The bed.... I made it a little library and attached some book slings, that I made, to the bed frame. I also made a book sling for beside her bed.

Under the bed


The end of the underbed area


Bedside Sling


I made the slings after being inspired by THIS tutorial, although I didn't follow it at all. I used a double curtain rod set (it was cheaper than buying all the parts separately like she recommends in the tutorial), but the downside of using a double curtain rod bracket is that the book sling can't carry as many books because the rods only sit an inch apart (a problem for fatter books). I'm not sure how this could be solved, but it's something to consider if you make your own book slings. Perhaps off-set, single brackets or extended arms or something..... The fabric was purchased at Ikea and I still have a bit of the bug material which I plan on using to make a body pillow to replace the flip chair that is currently under there (it takes up too much room).

The other big craft project that I did to make the room tidier and roomier, was to make a stuffy storage thing-a-ma-jig (it's a stuffy jail, there is no better way to describe it, I'm afraid). I was inspired 
by a stuffy Zoo that I found online, but decided to try to make one myself. I re-purposed a VHS storage cabinet that my Mom made for me in the late '90s that has sat empty since we converted, first to DVDs, and then to Digital movies. I didn't want to get rid of the cabinets though (they are solid pine and my Mommy made them) so I've been lugging them around for a years.


First I took off the doors and installed a dowel.


Then I stained the entire thing green (Chey's favourite colour)


Then I took a hammer and expressed some lingering frustration in a most satisfying manner...... this is known in DIY circles as "antiquing"


I then added hooks and bungie cords


And made this pile of stuffies (which were contained in TWO overflowing, pop-up laundry bins)


Look like this.....


Now that Chey's room is done... I can move onto my studio...... which currently looks like the place where our extra crap goes to die (it was tidy before Chey's room was demolished, but I have no photographic evidence to support this statement). I should paint first, but I can already feel the urge to skip that part setting in..... must resist?


Friday, March 30, 2012

A new tradition

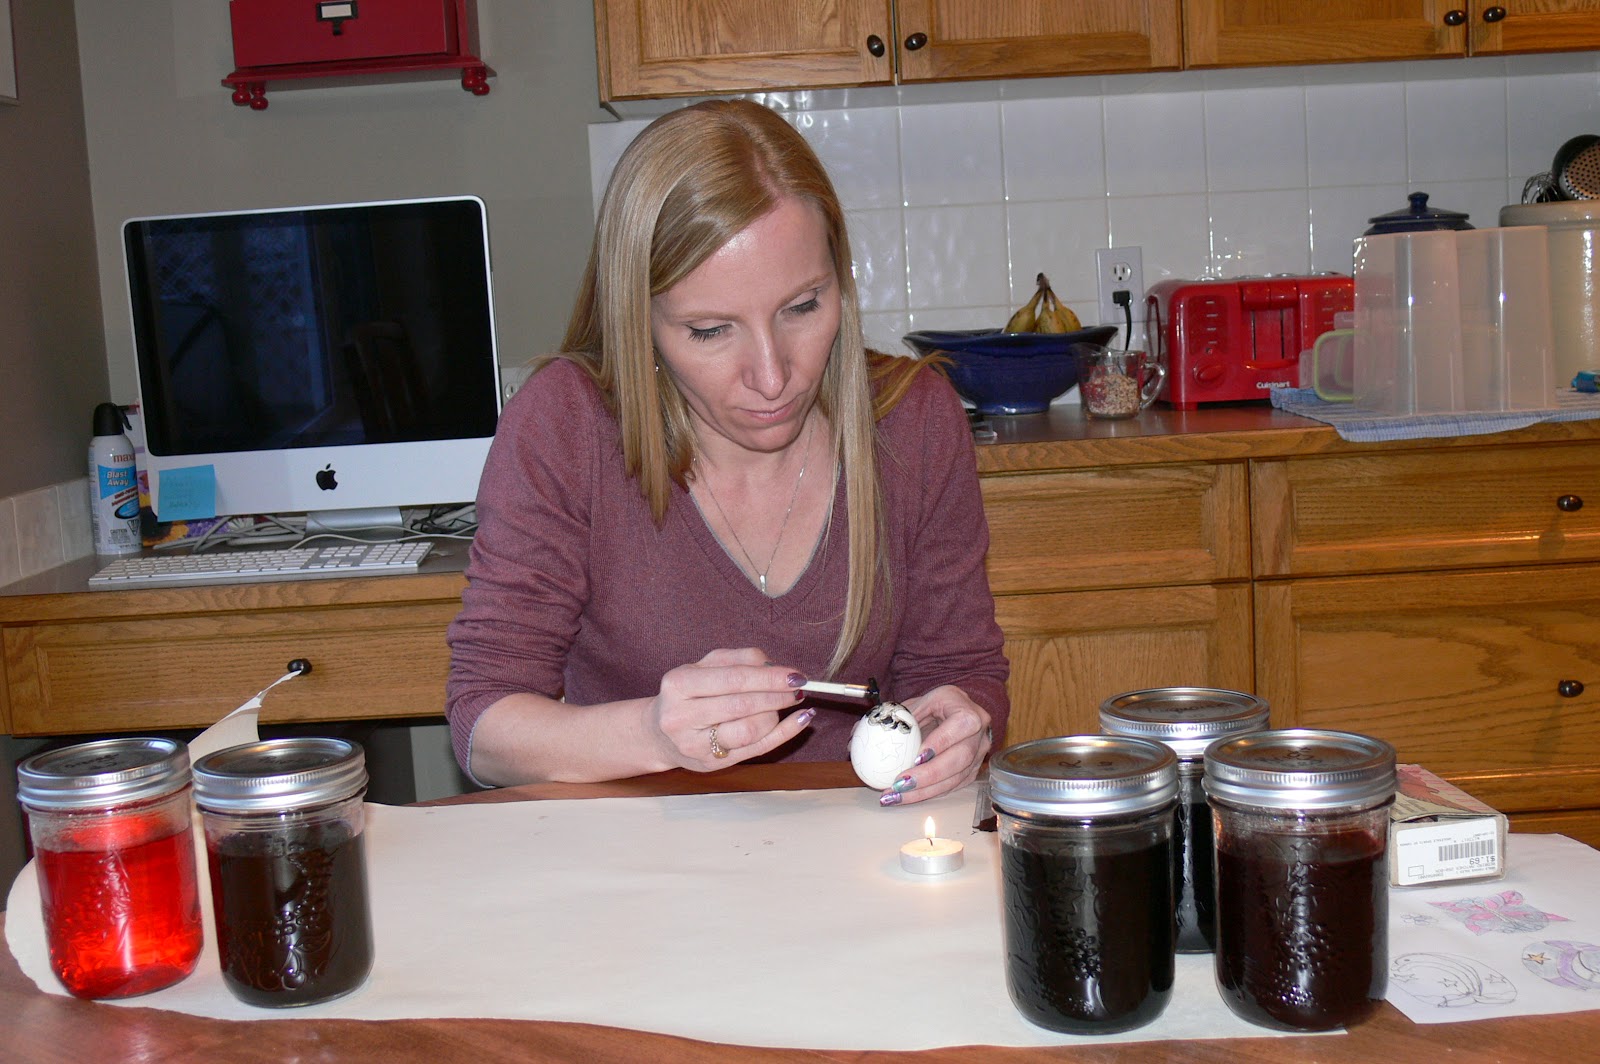
Want to keep kid interested in a craft project??? Find a craft that involves fire, melted wax, permanent dye and blowing stuff that looks like snot into a bowl.... AKA Pysanky or Ukrainian Easter Eggs.

This is a craft that I've always wanted to learn and I finally decided to find out how. After doing my typical google research, I discovered an Art Supply place in Calgary that sells the "authentic" Pysanky supplies and made a trip downtown to load up. Pysanky is relatively cheap. The Kistkas (the styluses used to draw) are a couple of dollars each as are the dyes. You can use any kind of beeswax (paraffin wax is not a good idea) and a candle.... that is really all you need. I bought a deluxe kit that included everything (I bought an extra Kistka and a tool for helping to blow out eggs) for around $50 (you could easily choose a couple of dyes and Kistka for much less. We have our favourite colours and have only used maybe six of the 11 dyes). Once the dyes are made up in mason jars (which I had to buy as well), they last for quite a while (I think I read several dozen eggs or a couple of years).

Traditional Pysanky uses raw eggs that are left whole and will eventually dry out. I, however, envisioned an egg getting knocked off it's display or exploding in storage and the resulting smell of decay and the disgusting clean up that would be required and decided to be less traditional. We would blow out the eggs' guts. You can blow first and ask questions later (as the egg contents are inedible if blown out after the dye process; the dyes are not food safe and some of the chemicals will soak into the egg) or design first and blow later. The biggest disadvantage to blowing first is that it is hard to hold the eggs down in the dye and there are white spots left where the holes are punctured (they are covered in wax so that dye doesn't get inside the egg and ruin the egg and/or the other dye baths). I decided we would blow first. And who best to blow... the people with the most air (it was silent for a whole 5 minutes during this process)


The process of Pysanky is simple. I found a fabulous website that I more or less followed (we didn't do the vinegar or orange bath).

1) We drew our designs on paper and coloured them with crayon so that we knew which order to cover and dye (some of us were faster and went straight back to the important job of finishing a level on our DS).


2) Draw your design in pencil on the egg (we found that it is easier to do lots of geometric line designs with fewer areas to fill in. My original thought was that larger designs that would be filled in would be easier for the kids, not so).

3) You then prepare your kistka, by holding in the flame for about 10 seconds and scooping wax off the sheet into the funnel (I did the scooping, I was worried about slippage and blistered fingers). The kistka is then reheated and the melted wax is used to draw.

4) To start your egg, you cover all the areas that you want left white with wax and dip into the lightest dye that your design has (yellow or orange).


5) After the egg is dyed and patted dry, you draw over the areas that you want to preserve as the colour of your first dip.

6) You then dip into the second colour (progressively darker with black being last) and repeat the process all over again. Most websites recommend only using 2-3 dips and we didn't experiment beyond the recommendation and in fact, I preferred the look of only 2 dips.


7) Once the design is complete it looks .... well, like crap. The egg is covered in wax which then needs to be removed. I decided to use the hairdryer method which worked really well, but you have to be careful not to overheat the egg or it explodes..... ask me how I know. You heat sections of the egg and carefully wipe off the melted wax, revealing your creation.
Chey drew a Mososaurus (T-Rex of the Sea) on her egg.... I'm fairly certain that is NOT a traditional Ukrainian design

My second attempt (the one that exploded...... although it did hold together due to the inner egg membrane  and I think the varnish will keep it whole)

After wax removal

8) Varnish and display and you're done.

These are shot glasses that I thought worked perfected to display the eggs. 

This was my first attempt. I learned that large scale drawings are hard to cover completely... It's supposed to be a dolphin

All lined up (Eli still has to finish his)

This was my third and best attempt. I used mainly lines and only choose two colours. It is really quite pretty.
I now have a "kit" set up in the form of a plastic bin with the filled jars, some place mats (instead of wasting paper and for better absorbency), a plastic mat (for dyeing on) and the rest of the supplies.... It should be easy to pull out at any time.

You should try it!

Sunday, October 23, 2011

Shrunken heads, knives, pumpkins and carnage....

Must be the start of Hallowe'en decorating!

I've nearly finished both kids' costumes (Chey's is complete, you saw that a couple of days ago). Eli's still needs a few finishing details and I hope to post about that in a few days, but thought I'd share the other Hallowe'en preparations. We plan to do a "Haunted Porch" again this year, but that won't be put up until next weekend (Wind and black plastic don't mix), but I thought the few little bits we do have up are cute..... Well.... perhaps cute isn't exactly the right word......


Notice the desiccated heads in the spider web?? I made those a few days ago. It's a simple craft, really. Particularly if you have an apple peeler. First you peel the apples and dip them in a water and lemon mixture (to avoid excessive browning) and then you cut faces into the apples and hang them to dry..... I sped up the drying process by putting the apples on a cookie sheet at 170F for about 15 hrs (5 hrs at a time). It's an easy Hallowe'en craft project.....


And finally, the kids and I carved our pumpkins yesterday..... It was messy fun as always....


And in the midst of all the Hallowe'en stuff, I managed to finish a sweater for myself. It's been a busy couple of weeks!

Monday, February 9, 2009

Who knew knitting could be like skydiving??

Of course, I've never actually GONE skydiving, nor would I ever choose to do so. My idea of an intense adrenaline rush is trying to merge on the Deerfoot. If you live in Calgary, you'll know exactly what I'm talking about.

In the knitting adrenaline department, I'd have to say that lace knitting is right up there. Especially the last few rows of a shawl when you're knitting 400 stitches or more per row and you feel like the end is finally in sight... then you look at your yarn and realize that it's disappearing faster than you thought and maybe, just maybe, you won't have enough to finish the project as written...... Tonight was such a ride. I finally finished the third installment of Make One Yarn's Year of Lace for 2008 (the link is for 2009, but it's closed now so if you're interested you'll have to wait until 2010); Amy Swenson's Silver Birches shawl. It is a thing of loveliness, but it was a heart pounding adrenaline ride to the finish. It all started about half way through the shawl. I'd just started the second ball of yarn (there were 2, so I knew I had to be at least 50% finished) and was either just starting or halfway through the last of the body chart repeats and I thought to myself... "Wow, I only have the edging chart left and I've still got half my yarn.... yikes! I must be knitting tighter than I thought!.... I wonder if I should add another body repeat to make up for it??"... so I did.... and that decision set off the exciting finish that I just mentioned..... I knit the first portion of the edging chart and moved on to the second part when it struck me that my ball of yarn was looking rather thin..... VERY thin, in fact..... I knit another row and my thin ball got dramatically thinner.... I weighed my yarn... 3g. 3g is not a lot of yarn..... I knit a row and measured again... still 3 g, although the ball was noticebly smaller.... hmmmm... perhaps my scale isn't quite accurate enough for cashmere lace yarn, so I decided to bind off..... with 6 rows left of the chart..... It then occurred to me that I might not even have enough to bind off..... but I soldered on and with the tiniest amount of yarn left (enough for perhaps 3/4 of the next row or less) I finished the last bind off stitch. I finished this last stitch during Eli's Karate class and although I really wanted to run hooting and hollering through the gym, showing it to every man, woman and child there, I managed to somewhat control myself and only shove it in the face of the poor person next to me. I then calmly and politely folded it neatly and put it away to be blocked immediately on home entry.

Voila! Here it IS!!!!


On a rather less dramatic note, I also finished a hat that I designed. I have even written up the pattern and plan to test knit Chey's size and then I'm going to offer it (for free, I don't know what the heck I'm doing and I'm not charging for it) on Ravelry. Here is a picture of that.....


And on the spinning front. I think it's going well. I had a lesson from a friend (I hope I can call her that) who really helped me ease through the stuff I would have had to fight through on my own. I'm hoping to ply this stuff in the next day or so..... I'm going to test it as a 2ply and as a Navajo ply. I think 2 ply will be too thin. Using the spinner's gauge, it looks like a 2 ply will be a (thickish) laceweight and 3ply will be closer to sport... but we'll see


AND I made a new orifice hook. I wanted something pretty and this is, however I really need to remake it with a stronger wire with a longer hook section, but I'll have to order the wire to do it... in the meantime, this one works and it's pretty....